Ever wanted to create a video game but have no earthly idea where to even start? Maybe you’re an amateur programmer on a budget looking to make the next Undertale or Nidhogg, or maybe this is your very first foray into designing and coding games.
The process is challenging and requires patience just as much as it requires a strong intuitive interface. That’s exactly what GameMaker 2 is – an interface that makes the experience of creating your own game as simple and streamlined as possible. It’s an excellent tool for both beginners and experienced coders alike. You can download it for FREE right here:
What is GameMaker 2?
GameMaker 2 is a freely downloadable program in which users can make their own games. What kind of games?
Any, really, but you’ll mostly see platformers, adventure games, and shooters. For examples of games that were created using GameMaker, you can check out this list!
Do I need to know how to code?
Coding is advised and would certainly help speed along the process but no, it isn’t 100% necessary. GameMaker 2 has two different ways for you to design what happens: Traditional coding, or Drag and Drop.
Coding allows for tighter, more adjustable control over what happens to the objects and characters you create, but it is not wholly required. Upon creating an asset in your game, you can choose from a wide variety of features that you’d like your asset to do, as well as the contextual action that triggers it.
Do I need to know how to draw or animate? What about audio?
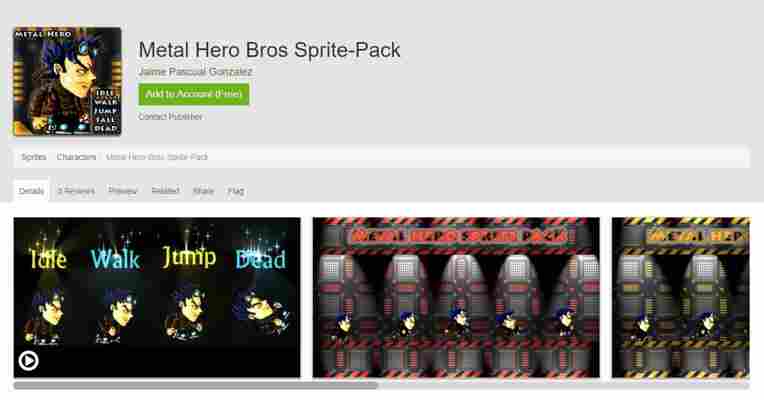
Again, knowing how to make your own images and audio is certainly helpful, and will give your game a unique individuality, but it is not needed to make a game. There’s a variety of mostly free images and animations that you can use without worry regarding copyright infringement. You can check out the catalogs both here and here . As for sound, anything you download from Freesound is always 100% legal and completely free of charge.
Remember, too, that your game doesn’t have to look like a AAA masterpiece – it just needs to be wicked fun! Check out Nidhogg, for example:
What are the basics?
While there are crash courses for beginners out there, we’ll cover some of the most basic terminology here and now:
Open up GameMaker 2 and you’ll see a column of game elements on the left. Click these to start creating and adding these elements to your game.
What’s some of this terminology?
Sprite: A sprite is any kind of image in your project. This can also be an animation if it has multiple frames. It has a point of origin that determines where its center will be, and that will be referred to later on during the coding.
Like we said, you do not have to have any artistic skill to make a sprite; you can easily import them from external .pngs, .jpegs, or plug-ins. Take some from the library we linked to above! Once you have a sprite uploaded you can use GameMaker’s own image editor to tweak and change the image files.
Object: While the sprite is the image of any given asset in your game, the actual asset itself is the object.
This refers to the code pertaining to the specific characters, bullets, or platforms, anything really. Objects also extend to elements such as simple game logic and interactivity.
Event: Events are actions that exist within an object in the game. Simply put, it’s anything that triggers the object to carry out with specific lines of its coding.
Events largely happen contextually, such as jumping when the player presses the assigned key, or dying when a certain parameter is met.
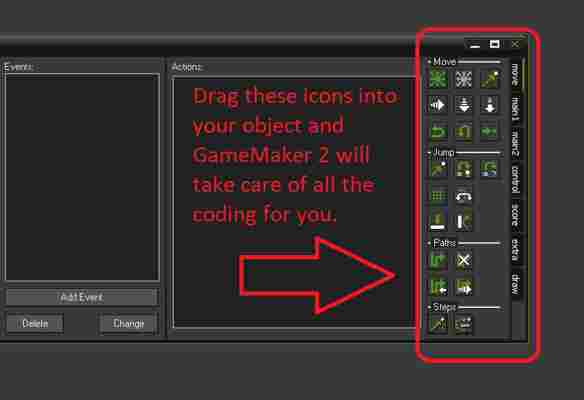
Action: The real meat of your design, actions refer to the code describing what should occur when a particular Event comes to pass. “When a certain event happens, actions can be carried out,” explains Sean Spalding from YoYoGames.
Actions can easily be implemented via GameMaker’s default drag and drop mechanics. We recommend foregoing this, however, and instead writing in your own code using GML (GameMaker Language). This will allow you far more control over the objects, events, and scripts that you’ll be working with.
Rooms: Lastly, rooms are where your game will take place. The illusion you’re trying to create is that players are traveling across a linear map, but the reality is that, upon hitting a certain trigger event or object, the code will transfer the player character to the next room you put in the queue.
Rooms are where you bring together all of your objects and resources into a cohesive, playable level.
If you’re brand new to game design, there’s a lot to learn at first. Our recommendation is to first check out this tutorial video series to get you off on the right track.
Follow along, but don’t try to do it all in one day. Rather, pace yourself through two or three videos at a time, taking notes and work alongside them. The information will stick better that way, and you’ll be able to more clearly recall the lessons in order.
Best of luck writing your first game. We can’t wait to see what you come up with!
More from Softonic
5 incredible multiplayer games for iOS and Android
The 10 best free to play games ever
10 best action games for your bucket list
Best video games to play with a partner